The transformation power of a fresh coat of paint is truly remarkable, especially when you're turning something as utilitarian as a shipping container into a cozy retreat. For those embarking on a similar journey, like the Upstate Adventure: Painting a Shipping Container Interior with Exterior Paint, the initial step of pm upstate adventure painting the interior of the shipping container became a pivotal moment, showcasing just what a difference a vibrant white can make. What began as a dirty, marked cargo box soon started to feel like a blank canvas for a dream weekend getaway.
From Cargo Box to Cozy Retreat: The Upstate Adventure Begins
The dream of a weekend escape in Upstate New York often conjures images of rustic cabins or modern tiny homes. For one adventurous couple, Pamela and Matthew, their vision involved a shipping container. Recognizing the economic advantages, they opted for a used container, a decision that, while budget-friendly, also meant embracing extra work. Their immediate goal wasn't a fully insulated, ready-to-live-in structure, but rather to make the space "pretty and cozy" for weekend use. This pragmatic approach, taking "baby steps" due to time and budget constraints, is a hallmark of many DIY container conversions.
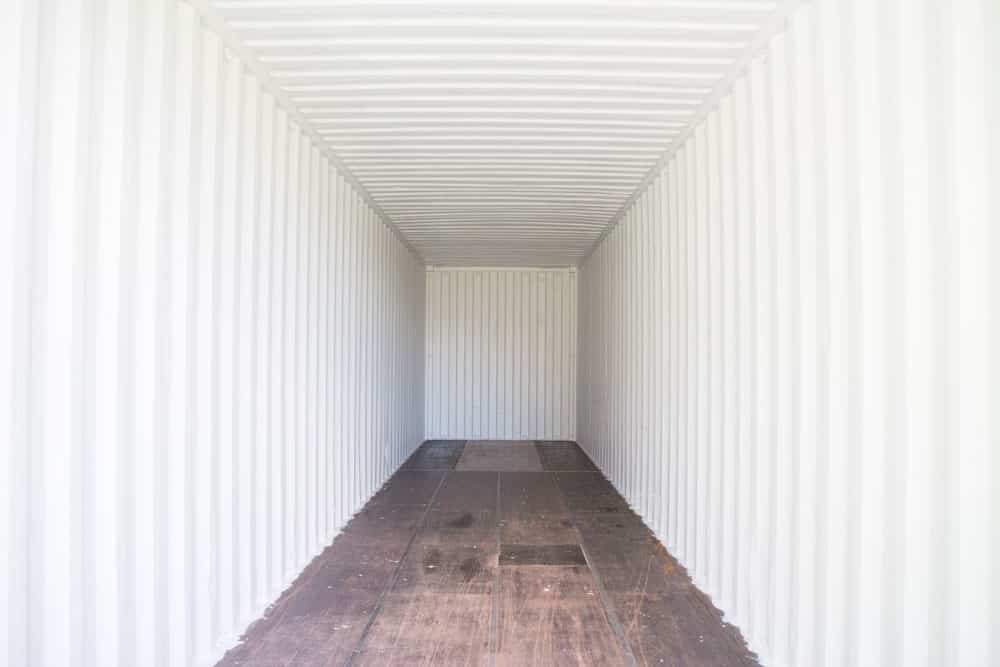
The container, having spent years lugging cargo, arrived with its fair share of dirt and scuff marks. Before any thoughts of walls or flooring, painting the interior became the essential first step. It wasn't just about aesthetics; it was about reclaiming the space, cleaning it up, and laying a clean foundation. This initial paint job, while temporary until full insulation could be installed, was critical in making the industrial shell feel more like a home and less like a storage unit.
Choosing the Right Paint: Why Exterior for Interior?
One of the most valuable lessons learned during the pm upstate adventure painting the interior of the shipping container concerned paint selection. Counter-intuitively, an exterior paint was chosen for the interior walls, and for very sound reasons that any container home enthusiast should note. Shipping containers, particularly uninsulated ones, experience extreme temperature fluctuations. In Upstate New York, this means freezing winters and scorching summers, creating significant temperature differentials that can lead to condensation and moisture issues inside.
The paint of choice was Valspar Duramax, an exterior paint + primer in one. This type of paint is formulated to withstand harsh weather, temperature changes, and moisture, making it ideal for the challenging environment of a shipping container. The integrated primer also means fewer steps, typically requiring just one coat for excellent coverage. However, due to the extreme dirt and markings on the used container, Pamela and Matthew found that two coats were necessary to achieve a completely clean, uniform white finish. This choice not only provided a bright, clean look but also offered a crucial layer of protection against the elements even before insulation was installed.
- Durability: Exterior paints are built to last against weathering, which translates to robustness in a container's fluctuating internal climate.
- Moisture Resistance: Crucial for preventing condensation-related issues inside the metal box.
- Temperature Fluctuation Tolerance: Designed to expand and contract without cracking, ideal for extreme heat and cold.
- Paint + Primer: Saves time and provides superior coverage, especially on challenging surfaces.
Budgeting Your Shipping Container Interior Paint Project
Cost-effectiveness is a major driver for choosing a shipping container home, and painting is no exception. For the P+M Upstate Adventure, painting all four walls (including doors) and the ceiling of their 9'6" tall container required four gallons of Valspar Duramax. At a regular price of $40 per gallon, the total would have been $160. However, by taking advantage of a Valspar sale at Lowe’s, they saved $30, bringing their total paint cost down to a very reasonable $130. This demonstrates the power of smart shopping and timing your purchases.
While the paint itself was the primary expense, remember to factor in other essential supplies:
- Paint Rollers and Covers: Invest in good quality rollers for a smooth finish and efficient application.
- Paint Brushes: Necessary for cutting in edges, corners, and detailed areas.
- Paint Trays: Multiple sizes for ease of use.
- Drop Cloths/Tarps: To protect the floor and any other surfaces from paint splatters.
- Painter's Tape: For clean lines around windows, doors, or areas you don't want painted.
- Cleaning Supplies: Rags, soap, and possibly a degreaser for thorough prep.
- Safety Gear: Gloves, safety glasses, and potentially a respirator, especially when painting in a confined space.
Even with these additional supplies, painting the interior of a shipping container is a relatively low-cost project that yields dramatic aesthetic results, especially when compared to the overall conversion budget. It’s an investment that instantly boosts the perceived value and comfort of the space.
Practical Tips for a Smooth Painting Process
Based on insights from the From Cargo to Cozy: Painting Our Upstate NY Shipping Container Home experience, here are some actionable tips to ensure your interior paint job goes smoothly:
1. Thorough Preparation is Key
Before dipping your brush, dedicate ample time to preparing the container. Given that used containers are often dirty and marked, a deep clean is non-negotiable. Wash down all surfaces to remove dirt, grease, and grime. A stiff brush and a good all-purpose cleaner or degreaser will be your best friends here. Allow everything to dry completely before painting. For rust spots, light sanding and a rust-inhibiting primer might be necessary, even if your main paint is a paint+primer.
2. Tackle the Ceiling Strategically
The ceiling of a shipping container, especially taller ones like a 9'6" high-cube, can be challenging. Matthew from the Upstate Adventure reportedly "felt it for a few days after," highlighting the physical strain. A sturdy ladder or, even better, a step stool with a platform is essential for stability and reach. Consider using an extension pole with your roller to reduce strain and improve coverage. Work in manageable sections to avoid overreaching or rushing.
3. Don't Skimp on Coats (Even with Paint + Primer)
While paint + primer products often promise one-coat coverage, the reality of a dirty, dark, or heavily marked shipping container often requires more. Pamela and Matthew found two coats essential for complete coverage. Applying thin, even coats is always better than one thick coat, which can lead to drips and uneven drying. Allow adequate drying time between coats as per the manufacturer's instructions.
4. Prioritize Ventilation and Safety
Painting inside a metal box can quickly lead to poor air quality, especially when using exterior-grade paints which can have stronger fumes. Ensure proper ventilation by opening both ends of the container (if possible) or using fans to circulate air. Always wear appropriate personal protective equipment (PPE):
- Gloves: Protect your hands from paint and chemicals.
- Safety Glasses: Guard against splatters, especially when painting overhead.
- Respirator Mask: Crucial for protecting your lungs from paint fumes, even in well-ventilated spaces.
5. Plan Your Painting Order
A common strategy is to paint the ceiling first, then the walls, and finally any trim or doors. This approach allows you to catch any drips from above before they land on freshly painted lower surfaces. For shipping containers, considering the corrugated walls, starting with the inner "grooves" using a brush before rolling the wider sections can ensure full coverage.
What We Learned: The Immediate Impact and Future Dreams
The experience of pm upstate adventure painting the interior of the shipping container underscored several key takeaways. First, the immediate visual impact of white paint is undeniable; it instantly transformed a grim, industrial space into a bright, clean, and inviting one. It made the temporary living conditions not just tolerable but genuinely pleasant for weekend stays. Second, the importance of selecting the right product for the unique conditions of a shipping container (exterior paint for interior use) cannot be overstated.
This initial painting project was just one "baby step" in a larger dream. While the fresh white interior provides immediate comfort, future plans include installing insulation, building internal walls for a bathroom, and laying down flooring. Each step builds upon the last, transforming a simple metal box into a unique and cherished getaway.
Painting the interior of a shipping container is a foundational step for any conversion project. It's a relatively inexpensive yet profoundly impactful task that cleanses the space, brightens it, and signals the transition from cargo carrier to cozy abode. By choosing the right materials, planning diligently, and embracing the DIY spirit, you too can achieve a stunning transformation, just like the P+M Upstate Adventure, turning a raw container into the first stage of your dream escape.
